Vegan Halloween cakes kick off this guide so you can bake bold, chocolate-forward treats that impress without dairy or eggs.
Curious how a silky ganache cake and spooky chocolate cupcakes can come together in one afternoon? You’ll get clear recipes, pantry swaps, and timing tips so you can plan prep, cooling, and decoration without stress.
You’ll bake two showstoppers today: rich chocolate cupcakes with playful toppers and a smooth black ganache celebration cake. The post covers essential ingredients, bowl-by-bowl mixing steps, oven checks, and ideal temperature ranges for reliable structure.
Skill level and tools are spelled out so you can jump straight into baking with confidence. Expect notes on plant milk choices, cocoa style, sugar alternatives, and how to keep the cake top sleek when frosting or smoothing ganache.
For seasonal flavor ideas and wellness reads, check Health Conservatory and its blog, and use the Smoothie Generator to plan complementary drinks: Health Conservatory, Health Conservatory blog, Smoothie Generator.
Key Takeaways
- Simple, chocolate-forward recipes for a ganache cake and spooky cupcakes.
- Clear baking steps, oven temperature, and timing to avoid rushed assembly.
- Ingredient swaps for stable batter without eggs or dairy.
- Decorating tips to keep the cake top smooth and visually striking.
- Storage and serving notes so desserts hold well at room temperature.
vegan halloween cakes to kick off spooky season
Start spooky season with two straightforward, chocolate-forward bakes that look dramatic. You’ll make deeply fudgy cupcakes and a sleek black ganache cake that’s perfect as a centerpiece.
What you’ll bake today
- Deep chocolate cupcakes filled with blackberry coulis and piped buttercream.
- A smooth black ganache cake finished for a showstopping centerpiece.
Read this first: pantry and equipment basics
Stage ingredients in two bowls: dry in one, wet in the other. Measure flour, cocoa powder, sugar, and vanilla ahead so you work quickly.
Essential tools: 12-hole muffin tray, cupcake liners, piping bag with an open star nozzle (1M), a large mixing bowl, electric whisk or stand mixer, spatulas, measuring spoons, and a wire rack.
Pantry cues: use Dutch-processed cocoa powder for deep color. Choose soy or another plant milk and an oil or plant-based butter for texture. Add apple cider vinegar to plant milk to make a vegan “buttermilk” if needed.
Oven tips: preheat to 350°F (180°C) and place the tray near the center. During the first part of baking, make sure you avoid opening the door so the rise stays steady.
For planning and nutrition ideas, visit the Health Conservatory home and the Smoothie Generator for complementary drinks.
Essential vegan ingredients and swaps for dark, chocolatey results
Choose the right powders and fats first to lock in a deep, even chocolate flavor. These choices shape color, rise, and mouthfeel for both cupcakes and a celebration cake.
Cocoa powder choices
Dutch-processed vs natural: Dutch-processed cocoa is alkalized for a deeper color and smoother notes. Natural cocoa tastes tangier and reacts differently with leavening.
Make sure you use the type your recipe calls for; swapping can change rise and flavor. Sift powders into your bowl to remove lumps and add air.
Plant milk and apple cider vinegar trick
Stir 1 tbsp apple cider vinegar into 1 cup soy or another plant milk and rest 10 minutes. This mildly curdled “buttermilk” gives acidity for leavening and a tender crumb.
Add cooled coffee to the wet mix if you want to intensify chocolate without extra sugar.
Fats, room temperature tips, and texture
Use oil for a moist, soft crumb; reserve vegan butter for buttercream where structure and flavor matter. Bring fats and milk to room temperature so the batter emulsifies and doesn’t split.
- Adjust sugar slightly if you use a bitter cocoa to keep balance with vanilla and fruit fillings.
- Measure by weight when possible and sift powder for consistent results.
- If vegan butter is unavailable, pick a neutral oil for the batter and keep butter for frosting.
For seasonal ideas and pairing suggestions, visit the Health Conservatory blog.
Step-by-step: chocolate blackberry vegan Halloween cupcakes
Get your liners ready and preheat the oven so you can move through batter and fillings without rush.
Prep and batter
Preheat to 350°F (180°C). Line a 12-hole tin with liners. In a bowl whisk the dry mix: flour, Dutch-processed cocoa powder, baking soda, salt, caster sugar, and muscovado sugar.
Mix 1 cup soy milk with 1 tbsp apple cider vinegar and rest 10 minutes to make vegan buttermilk. Add cooled coffee, apple puree, 1/3 cup oil, and 1 tsp vanilla. Fold wet into dry just until the batter is combined. Do not overmix.
Bake and timing
Portion batter evenly and bake 22–25 minutes. Test with a toothpick at center. Keep the oven door closed for the first minutes to protect the rise. Remove and cool on a rack before coring.
Blackberry coulis
Simmer blackberries with 2 tbsp sugar and 2 tbsp water about 12 minutes until thick. Cool to room temperature. Reserve a few tablespoons for the frosting.
Buttercream and piping
Whip vegan Swiss meringue buttercream using aquafaba. Split the batch. Stir cocoa powder into one half and a spoonful of coulis into the other for a two-tone effect.
Load a piping bag with alternating chocolate and berry buttercream stripes. Pipe from the outside in to form a neat swirl and finish with a small lift at the top.
Toppers: skulls and spiders
- Melt chocolate gently over a bain-marie to make skull molds. Avoid direct heat so chocolate stays smooth.
- Assemble Oreo spiders by placing an Oreo on each iced cupcake, attach candy eyes with a dab of icing, and draw legs with writing icing.
- Finish with a light dust of powdered sugar or cocoa powder if desired for contrast.
“Prep, timing, and gentle heat are the keys to tidy swirls and intact toppers.”
| Step | Key temp / time | Notes |
|---|---|---|
| Preheat & prep | 350°F (180°C) | Line 12-hole tin; rest buttermilk 10 minutes |
| Mix & fold | N/A | Whisk dry, fold wet until just combined; avoid overmixing |
| Bake | 22–25 minutes | Test with toothpick; keep door closed early |
| Coulis & fill | ~12 minutes simmer | Cool to room temp; reserve for frosting |
For seasonal serving ideas and pairing tips, see the Health Conservatory blog.
Showstopper cake: smooth black vegan ganache finish

Finish your layered cake with a glossy black ganache for a dramatic look and clean edges. Heat plant-based cream until just steaming. Stir in black gel color, then add chopped dark chocolate. Rest, then whisk until smooth and glossy. Stir in a little vegan butter and cover with plastic touching the surface to prevent a crust.
Troubleshooting texture:
- If too firm, add a splash of warm cream and whisk until loosened.
- If too loose, add more chopped chocolate to firm the mix.
- If it splits, warm gently and re-emulsify; blend to remove lumps.
Layering and smoothing:
Level layers, add thin ganache between each, then apply a crumb coat and chill 15 minutes. Add the final coat and smooth with a warmed cake scraper. Keep the scraper perpendicular and pull inward for a flat top and sharp sides.
You can use a quick torch pass to boost shine. Roll thin fondant ghosts, draw faces, and attach with a dab of melted chocolate or a slight warm-up of the ganache. Pipe swirls with a piping bag once leftover ganache is whipped to a light texture.
| Step | Action | Time / Temp | Tip |
|---|---|---|---|
| Make ganache | Heat cream, add chocolate & color | Just steaming | Rest then whisk for gloss |
| Crumb coat | Thin layer around cake | Chill 15 minutes | Locks in crumbs |
| Final smooth | Apply second coat & scrape | Room temp finish | Warm scraper for clean edges |
“A brief chill and a warmed scraper are the small moves that make a pro finish.”
For serving ideas and party menus, see the Health Conservatory blog.
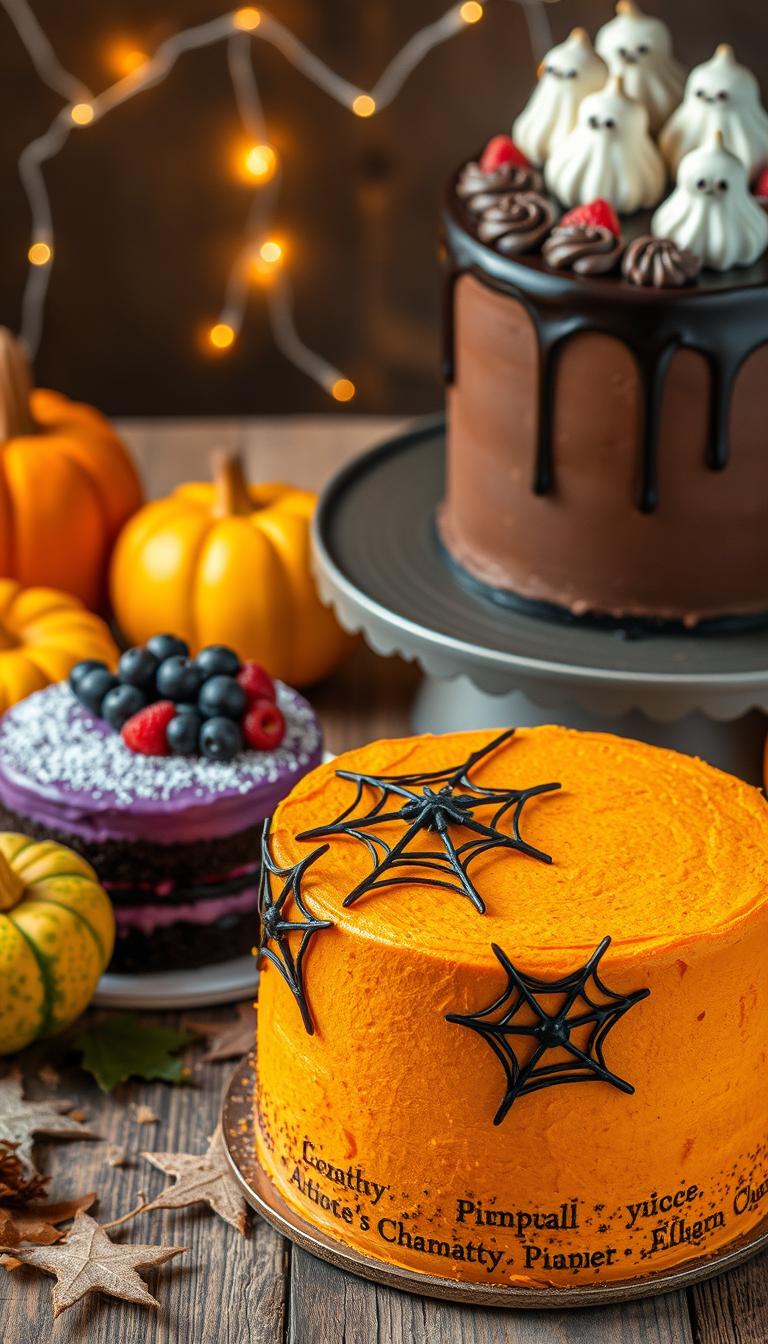
Decoration ideas to make your cakes scream Halloween
A handful of color and texture tricks makes each cupcake and layer pop. Focus on contrast and crisp piping so your desserts look sharp on the table.
Use black cocoa, orange buttercream, and spooky piping details
Black cocoa gives a near-black base. Pair it with bright orange buttercream for instant contrast. Use gel food color so the frosting stays thick and holds peaks.
Textural add-ins: nuts, crushed cookies, and cocoa nib “grave dirt”
Blend cocoa nibs with finely crushed cookies to make edible “grave dirt.” Sprinkle around the top or base for a realistic touch.
- Pipe webs, borders, and stars with steady pressure, using icing for outlines and buttercream for height.
- Create Oreo spiders with candy eyes, or perch small chocolate skulls along the top ridge for drama.
- Echo flavors with a hint of vanilla or milk chocolate in the frosting so decorations taste as good as they look.
- Adjust sugar in frosting if black cocoa adds bitterness to balance the final bite.
- Plan oven and cooling time so decorations go on completely cooled cupcakes and cake tops.
| Element | Use | When to add | Tip |
|---|---|---|---|
| Black cocoa base | Deep color for frosting or crumbs | Mix into buttercream | Offset with orange buttercream |
| Orange buttercream | Contrast and festive color | Pipe after cooling | Use gel color to avoid thinning |
| Grave dirt | Crushed cookies + cocoa nibs | Sprinkle at end | Add near edges for drama |
| Quick toppers | Oreo spiders, chocolate skulls | Place on chilled tops | Attach with small icing dots |
“Contrast and texture are the fastest ways to make desserts read seasonal and professional.”
For more seasonal ideas and party pairings, see the Health Conservatory blog.
Timing, storage, and serving so your bakes stay light and fluffy

Plan your timeline so each component has time to cool, set, and shine before assembly. Proper pacing preserves texture and keeps toppers intact.
Prep time, bake minutes, and cool-down windows
Prep time includes measuring flour, sugar, and powder, plus making coulis and warming milk if needed.
- You’ll budget prep time so cupcakes can bake for about 22–25 minutes and rest in the tin ~10 minutes.
- Move cupcakes to a wire rack for 30–40 minutes so steam escapes and crumbs stay light.
- Schedule chocolate work—skulls and ganache—earlier so it sets fully before display.
Fridge vs counter: days to keep, bring to room temperature before serving
- You’ll make sure frosted cupcakes chill only when needed; bring them to room temperature 2–3 hours before serving so butter-based frostings soften.
- Store in the fridge in an airtight single layer up to 5 days; label containers with days to avoid guesswork.
- Freeze decorated cupcakes up to 3 months—freeze single layer until solid, then pack; thaw covered at room to prevent condensation on the top.
- Plan oil and milk purchases for extra frosting batches, and keep flour and sugar sealed and measured to save time.
- Track venue temperature: on a warm day, stage desserts in the fridge and bring out just before service to protect structure and shine.
| Action | Time | Tip |
|---|---|---|
| Bake cupcakes | 22–25 minutes | Place tray center; don’t open early |
| Cool | 10 min in tin; 30–40 min rack | Move before filling |
| Serve | Bring to room 2–3 hours | Softens butter frosting |
“A short rest at room temperature makes the biggest difference in bite and shine.”
For planning and general wellness resources, visit the Health Conservatory home to pair desserts with drinks and menus.
Helpful vegan baking resources and tools you can use today
Keep a small toolkit of tested links and templates so you can plan flavor pairings and grocery runs in minutes. Use digital and printed recipe card systems so bowl, flour, and milk measurements are ready at a glance.
Plan flavors and nutrition with the Smoothie Generator
Balance taste and macros: Use the Smoothie Generator to test plant-based ingredient combos that pair well with chocolate-forward desserts. It helps you plan complementary flavors and party menus quickly.
Explore seasonal recipes on the Health Conservatory blog
Browse the Health Conservatory blog for seasonal recipes and ideas you can adapt into frosting, coulis, or quick toppers for cupcakes.
Find wellness tips on the Health Conservatory home
Consult the Health Conservatory home for broader food and wellness resources that guide shopping lists and serving sizes.
- Keep a printed recipe card or digital card for each bake to note icing, chocolate percentage, and powder choices.
- Pre-sift dry powder ingredients into a staging bowl to speed mixing on bake day.
- Group milk, flour, and chocolate on one shopping template so you don’t miss essentials.
- Link these resources into your planning doc for quick access while you bake.
| Tool | Use | Why it helps |
|---|---|---|
| Smoothie Generator | Plan pairings | Matches flavors and macros |
| Recipe card | Save measurements | Speeds bowl-to-oven work |
| Shopping template | Group essentials | Prevents missed ingredients |
“A compact set of links and a simple card system will cut prep time and keep your cupcakes consistent.”
Conclusion
Wrap up your bake day with a simple checklist to keep batter, oven time, and frosting in sync.
Choose one recipe to start this week: make the cupcakes or the celebration cake, then scale up once you nail timing and texture.
Measure flour, sugar, and cocoa in a bowl, add milk and oil at the right pace, and test doneness in the oven at the recommended minutes. Prep a piping bag for buttercream swirls and keep icing sugar handy for fast adjustments.
Store finished treats in the fridge for a few days and bring to room temperature before serving for the best, light fluffy bite.
Next step: try one bake today and use the Smoothie Generator and Health Conservatory blog/home (DoFollow) to plan pairings and troubleshoot.